Trying different optimizers

First step to increse accuracy is to implement an optimizers. An optimizer is used to train the model accurately with reduced loss. Once the loss is reduced the accuracy of the model increases. This will be our basic idea to begin with. Some of the various optimizers that we are using in this experiment are :
1) SGD
2) ASGD
3) LBFGS
4) Rprop
5) RMSprop
6) Adam
7) Adamax
8) Adagrad

Here we try the SGD optimizer to find the accuracy.


    The accuracy results for SGD was : 52%

Adagrad Optimizer

The second optimizer I tried was adagrad and the results were not quite as i expected as the accuracy fell instead of increasing.


    The accuracy results of Adagrad optimizer was : 34%


The Adam optimizer

The Adam optimizer gave a good accuracy rate of 55% , greater than the previous two. inorder to find out what maximum accuracy rate I would get i did make a few changes by changing epoch to 5
By doing this I could minimize the loss and thus i got a better accuracy of 61%.

    The accuracy of Adam at epoch 2

    The accuracy of Adam at epoch 5 and epoch 10

    Once I changed the epoch to 5 I did get a better accuracy as the loss minimized a lot more than when epoch was 2. Keeping the same in mind I again changed the epoch to 15 (takes a lot of time to run though) but the loss did not minimize much and it was almost the same as epoch 10 and thus the accuracy didnt change and stayed at 61%.
    At this point I connected an extra layer (Fully Connected 4 (FC4)) and ran to see if I could get better results. But the accuracy rate did not change from 61%. Therefore I moved on to a different optimizer.

The Rprop Optimizer

The Rprop optimizer had a not so good accuracy rate.


    The Accuracy of Rprop Optimizer was : 16%

The RMSprop optimizer

The Rmsprop optimizer had the least accuracy amongst all other optimizers.


    Accuracy rate with RMSprop optimizer is 10%

The LBFGS optimizer

The LBFGS optimizer was good but not great in terms of accuracy when compared to the other optimizers. An extra closure function needs to be added while using the LBFGS optimizer.


    The Accuracy Rate was : 10%

    We can notice that the accuracy rate is 10% after using the LBFGS optimizer , exactly same as the RMSprop optimizer.

The ASGD optimizer

The accuracy was quite less compared to few optimizers but better than Adagrad , LBFGS , Rprop and RMSprop.


    The Accuracy with ASGD optimizer was : 37%


The Adamax optimizer.

The Adamax optimizer had one of the highest accuracies with 55% , similar to that of Adam optimizer However when I changed the epoch to 5 the accuracy increased to 61% which had a faster growth compared to Adam optimizer at epoch 5.
Just to be sure I did run it again by increasing the Epoch to 10 and I got an accuracy rate of 63% which was 2 Percentile greater than that of Adam at the same epoch. By now I had observed that the highest accuracy rate can be achieved using Adamax optimizer by making a few tweeks in the hyperparameters.


    The accuracy at Adamax before changes.


    The accuracy of Adamax at epoch 5

    The accuracy rate incresed to 61% at epoch 5 same as that of adam but at epoch 10 the loss was lesser compared to Adam Also the accurscy rate at epoch 10 was 63% more than adam which had 61%.


    The Hyperparameter changes.

    I added an extra Fully Connected Layer to the existing 3 layers guessing it will increase the accuracy rate , when there is an extra layer to match, The loss would minimize and the accuracy would increase. Thus the basic ideology is to decrease loss and increase the accuracy. Which did work and the accuracy increased by 1% to 64%


    Decrease in loss at epoch 10


    Changing the Shape of Convolution Neural Network and the number of Neurons per layer

    I tried the multiples of the already existing nummber of neurons per layer . I tried to increase the number of neurons and thus achieved the highest accuracy
    After alot of changes to the CNN and multiple runs I finally found the combination that gave me the highest accuracy of 76%.


    Loss at Epoch 15

    The loss had decreased to 0.052 which was very low compared to 0.167 at epoch 10. thus the outcome accuracy had to be higher


    The Final Accuracy rate after all the changes was 76%.

    This was the final accuracy achieved with :

    1 ) epoch 15

    2 ) conv2d(3,64,3)
    conv2d(64,128,3)
    conv2d(128,256,3)

    3 ) fc1(64*4*4,240)
    fc2(240,168)
    fc3(168 , 88)
    fc4(88,10)


Visulaization of The accuracy rate of all the optimizers used.

The accuracy rate of all optimizers have been compared in the bar graph below.


    The runtime varies for each optimizer.


    The runtime of all optimizers at epoch 2 are visualised in the bar graph below.

    Having a visulaization can give instant reading as to which optimizer has the best accuracy in a lesser runtime.

    Visulaization of optimizers at epoch 5.

    The runtime of the top three optimizers have been compared in the bar graph below.


    Visulaization of optimizers at epoch 15.

    The runtime of the top two optimizers have been compared in the bar graph below.


Contributions

I have applied all the various optimizers to the model and run them indivisually to find out which optimizer had the best accuracy. After the best optimizer (Adamax in my case ) was decided I have tried to change the hyperparameters as suggested in the instructions of the assignment 
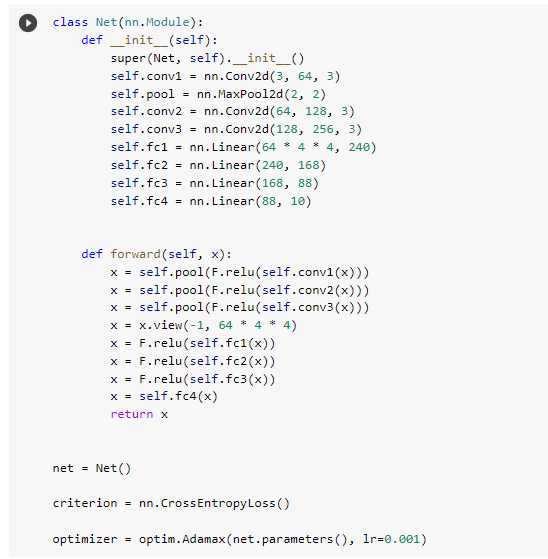
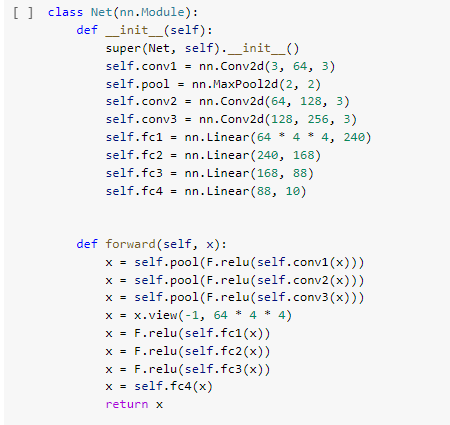
I have increased the Fully Connected layer (from fc(3 to fc(4))) I have changed the number of neurons per layer and thus increased the accuracy from 55% to 76%

Challenges

The challenges i faced was how to change the number of neuron and shape of conv 2d inorder to attain the maximum accuracy possible. I did increase the accuracy to 63% by changing the epoch to 15 But even after I changed the Conv2d i had a lot of errors. at this time the reference below helped me push the value to 70% accuracy. Ater this I tweeked a few more values apart from the reference and also increased the fully connected layer (fc(4)) from which the accuracy rate hit 76%.

Visualization Benefits.

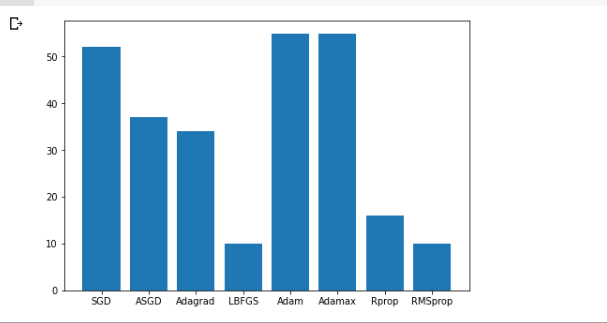
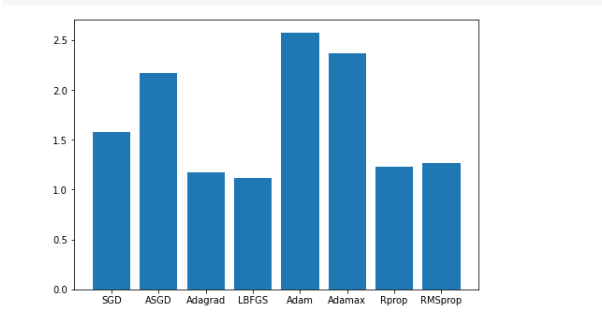
The visualization helped me find the best optimizer to use , based on the accuracy and runtime. In my case I had a tie between Adam and Adamax with 55% accuracy , that is when I had to plot the run time to figure out the best optimizer. When I changed the epoch to 15 Adamax had a slightly higher accuracy than the Adam optimizer. This is easily deducable from the above bar graphs.

Explanation o the basic algorithm

At the beggining we import the data sets of Cifar 10 through the torchvision package. If we are working on any other platform other than pytorch we can use the import torch package to run it on google colab / kaggle.

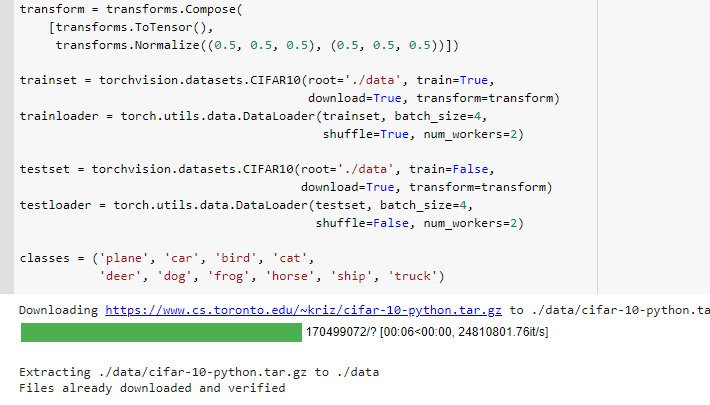
The train and test data are loaded

This function is to load 4 random images using the trainloader to see what kind of images are there in Cifar-10

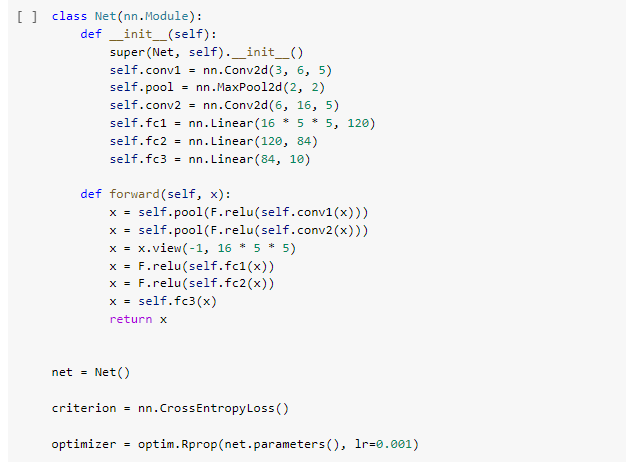
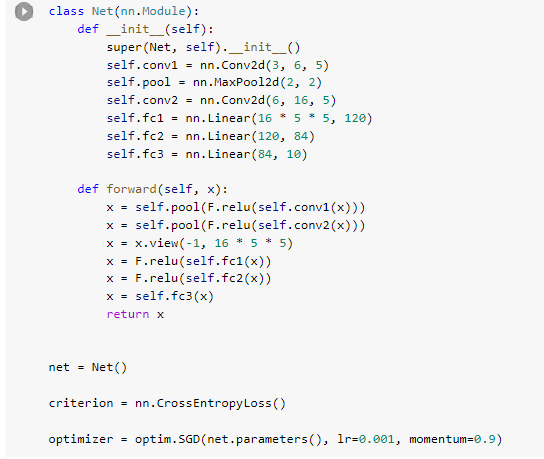
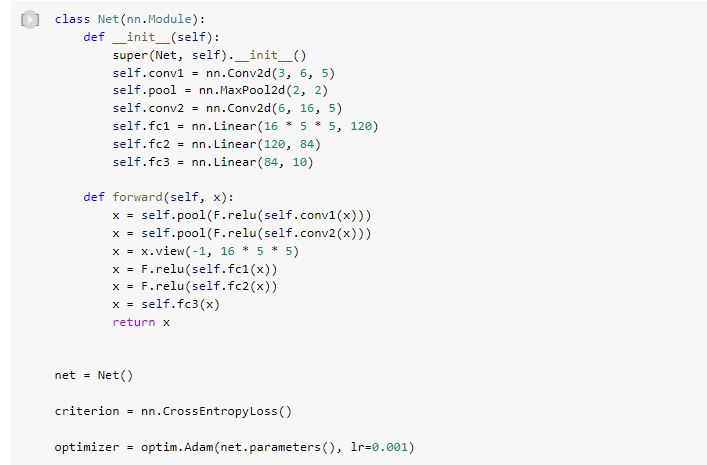
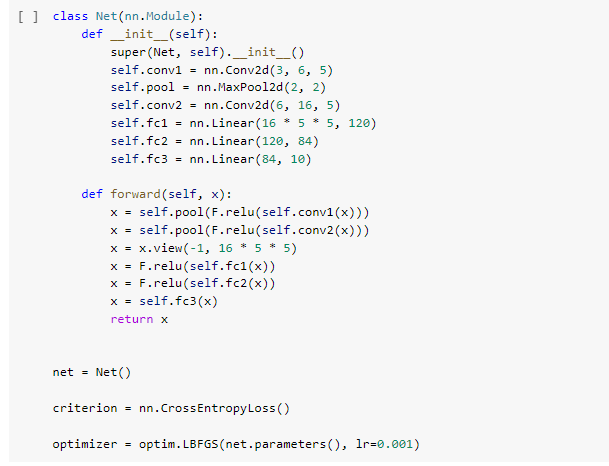
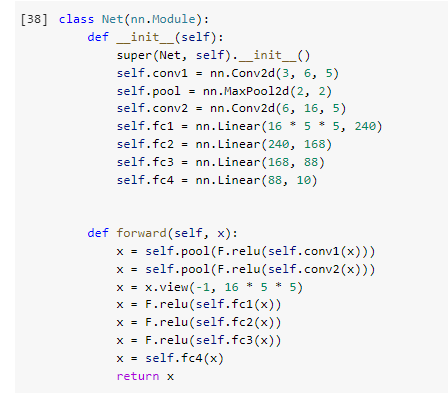
We now build the Convolution neural network by using 2 - Conv- Convolution layer, 2- Relu- Activation function , pooling-layer , 3 - FC - fully Connected layer

Below which we define the optimizer and loss function for the optimizer.

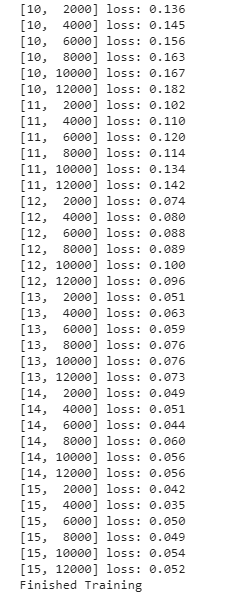
This funtion is to run the model for the defined number of times to reduce the loss. Suppose if epoch is 2 and limit is 12000 then the model will run from (1,2000) to 2(12,000) with 2000 intervals in between them. Here the loss of the training model is calculated ad will show the model so that we know how to reduce the loss.

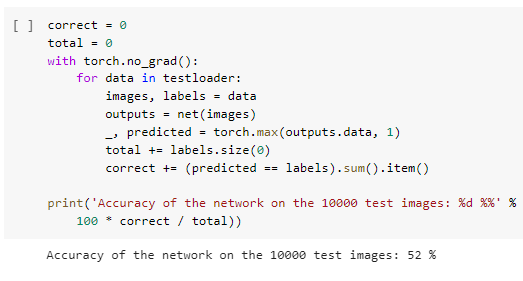
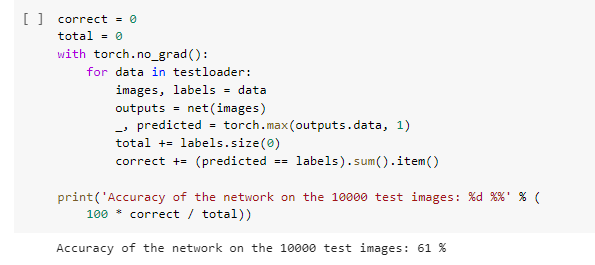
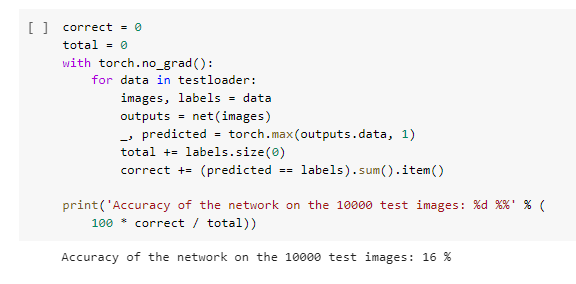
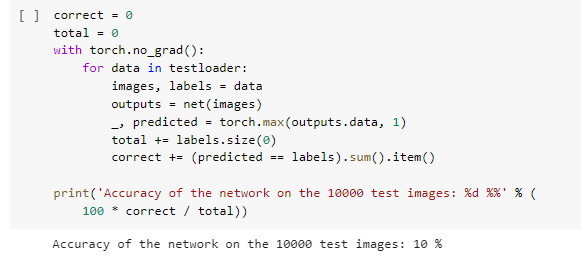
Predicting the accuracy for the test dataset based on the loss obtained from the training dataset

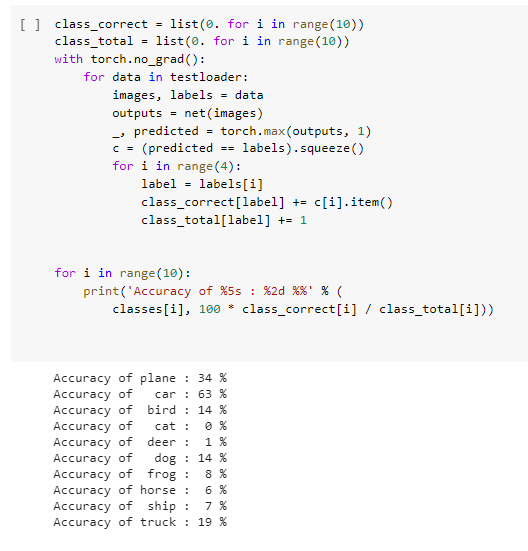
Here we get the matrix that includes accuracies o all images from which we can conclude how our model has worked.

References

Pytorch Tutorial.
optimizer usage.
Stefanfiott for CNN changes .


Links

Jupyter-notebook for all codes.
Github link for the blog post
My portolio

Contact


Any Queries ? Contact me !

Email Id : Neelesh216@gmail.com

Address : 404 E Border st, Arlington, Texas 76010, USA

Phone : 682 375 1222